
- • Which professional styling tools are absolutely critical for a flawless, damage-free cut.
- • Why dividing your mane into three precise sections guarantees perfect symmetry every single time.
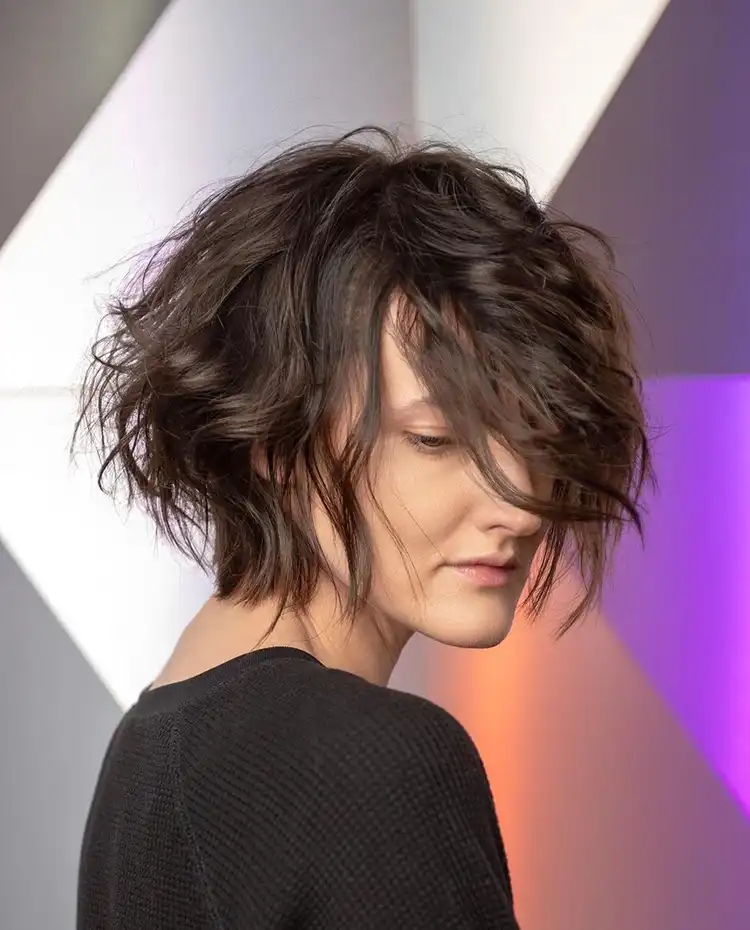
- • The texturizing secret for face-framing layers that creates gorgeous, instant volume.
- • A foolproof, step-by-step method to effortlessly trim even the trickiest bangs yourself.
Read in another language:
When your ends start looking like a dry, shapeless straw and your calendar is too packed for an emergency salon visit, a bold idea pops into your head: why not refresh your style yourself? And guess what? It isn’t crazy at all! Maintaining your length or reviving tired layers is totally doable right in your own bathroom if you go in with a plan, stay calm, and hold the right tools. The golden rule here is simple: don’t attempt an ultra-complex, multi-level celebrity shag on your first try. If you’re ready for a little beauty experiment, I’ve tested the most effective methods and put together a foolproof guide that ensures your DIY haircut at home turns out absolutely gorgeous, reports MODISTA.
I’ve always been fascinated by how small, technical adjustments can completely flip the script on home hair care, turning a routine chore into an exciting beauty ritual. From a practical standpoint, choosing to cut hair at home isn’t just a brilliant way to save money—it’s an amazing journey to better understand the unique pattern, weight, and flow of your strands. Experts even suggest that taking your beauty into your own hands builds a major confidence boost and gives a wonderful sense of control. Of course, we shouldn’t blindly assume a world-class masterpiece will happen with a single snip, but if you follow these clear, tested steps, the results will seriously blow you away.

The Pre-Cut Checklist: What to Gather Before Snapping the Shears
Before making that very first snip, set up your space. You’ll need bright, crystal-clear lighting (natural daylight is your best friend) and a large, steady mirror. Now let’s talk tools, because investing in professional shears is literally half the battle. Regular office or kitchen scissors are a total nightmare for your mane. They feature dull, thick blades that bend and crush the hair fiber rather than slicing it clean, which inevitably leads to a massive explosion of split ends just a couple of weeks down the road.
Instead, grab a pair of professional hair cutting shears with razor-sharp edges. For beginners, a blade length around 6–8 centimeters is the ultimate sweet spot—it fits snugly in your hand and glides smoothly without forcing you to strain your grip. Make it a strict rule to never use this specific tool to cut paper or tape, keeping the precision pristine. You’ll also want to grab:
Підписуйтесь, щоб не пропустити нічого цікавого! | Follow us so you don't miss anything interesting! | Subskrybuj, aby nie przegapić niczego ciekawego!
- • A fine-tooth flat comb for ultra-precise smoothing;
- • Professional salon clips or sturdy pins for easy sectioning;
- • Thin silicone elastic bands;
- • A small hand mirror to effortlessly check the back view;
- • A fine-mist spray bottle filled with clean water.
Wet or Dry? Demystifying the Age-Old Hairdressing Myth

When it comes to this debate, top stylists often disagree, mostly because the right choice depends entirely on your natural texture and desired outcome. Damp strands are naturally more obedient; they’re incredibly easy to separate, pull taut, and hold in place. But here’s the catch: once your hair completely dries, the length bounces up by roughly 0.5 to 1 cm. Forget to budget for that shrinkage, and you might find yourself with an accidentally short chop.
Working on completely dry hair lets you see the real-time results instantly. You know exactly how a layer sits the second you cut it, allowing you to tweak the shape as you go. This is a non-negotiable, iron-clad rule if you have curly or wavy hair—always cut these textures dry, since wet curls stretch out dramatically and bounce back unpredictably. For your debut attempt at a DIY haircut at home, I highly recommend washing, drying, and styling your hair as usual beforehand to avoid any unwelcome surprises.
The Mapping Strategy: How to Section Your Mane for Flawless Symmetry
If you want a perfectly symmetrical perimeter, mapping out your scalp is crucial. Trying to tackle all your hair at once is a direct path to a choppy disaster. Start by thoroughly detangling with your brush and parting your hair exactly where you wear it every day. From there, segment your whole head into three primary zones: left, right, and the back section.
To isolate the side sections, place your comb at the highest peak of your crown and trace a straight line down to the top of your ear. Everything behind the ear belongs to the back section—clip it away securely for now. Repeat the exact same step on the opposite side. Pull the two side panels forward over your shoulders. Voila! You now have three neat, manageable sections that make it incredibly easy to work through systematically without getting overwhelmed.
Easy Step-by-Step Techniques to Achievement Your Dream Shape

Soft framing around the face completely softens your look and injects gorgeous, airy body. You can easily refresh these pieces using a couple of simple tricks. Separate a 2.5 cm wide section of hair along your front hairline. Pinch it between your index and middle fingers, then delicately snip into the ends with tiny vertical micro-movements, pointing the blades upward. Next, point your shears downward and lightly slide them along the strand, barely closing the blades to melt away only the most frayed millimeters. Replicate this mirror-image action on the other side. Check yourself out in the mirror: if the ends feel a bit bulky, thin them out slightly with soft point-cutting to trim split ends with precision.
The Twist Trick: Dusting Away Split Ends Without Losing an Inch
Frayed, damaged tips rob your hair of its natural shine and polished texture. If you want to eliminate them without compromising your overall length, the twisting method is pure gold. Grab a small, thin section of dry hair and twist it tightly from root to tip into a neat little rope. The healthy fibers stay woven inside, while the split, dry hairs will magically pop out along the sides. Carefully snip those stray hairs away, trimming just 1–2 mm. Work your way through your entire head. This brilliant shortcut keeps your look incredibly fresh and polished between major transformations.
The Bold Shift: Mastering a Chic Short Chop on Yourself
Ready for a dramatic change? This technique is for the daring! Brush through everything smoothly and partition your hair into seven equal sections. Keep one piece right up front for potential framing, then build three matching mini ponytails on each side: near the temples, up at the crown, and down towards the nape. Start your cuts at the temple area, keeping your shears parallel to the floor and pulling the hair straight down. Move to the back next, using your previous cuts as a visual benchmark. Finally, work on the crown section, seamlessly blending the layers together. Finish the front, let down all the elastics, give it a big brush, and clean up any stray pieces.

The Foolproof Guide to Trimming Bangs Without the Drama
Bangs grow out at lightning speed, making a quick trim the absolute safest way to test your home haircutting skills. Here’s the thing: always do this on 100% dry hair! Section out your fringe zone into a crisp triangle, ensuring the base doesn’t extend past 1 cm beyond the outer corners of your eyes. Pin the rest of your hair back out of the way. Style your bangs exactly how you wear them daily. Place your flat comb right underneath the strands, using it like a straight ruler, resting it against your brow bone for stability. Crucial tip: don’t pull the hair tight with your fingers! Without that artificial tension, the hair won’t shrink up shorter than you intended. Slowly cut your way from the center out to the edges, pausing to evaluate after every tiny clip.

The Viral “Unicorn Method” for Effortless Shaggy Layers
You’ll be shocked by just how easy this is. Lightly mist your hair with a little water, lean forward, and brush your entire mane into a single, high ponytail placed right in the middle of your forehead. Grip the very tip of the ponytail firmly between your fingers, making sure it forms a crisp horizontal line. Begin carefully trimming the ends, angling your blades slightly away from your face. The moment you slide off the elastic and flip your hair back, you’ll be greeted by a gorgeous, multi-dimensional, ultra-trendy cascading cut with effortless movement.

The Best Volumizing Choices for Fine Hair This Season
Low-density hair requires more than just smart conditioning products—it calls for a strategic silhouette. Choosing a short-to-medium length is an absolute game-changer that instantly creates the illusion of thicker hair. The best part about these shapes? They don’t require heavy, damaging heat styling routine to look amazing, keeping your cuticle safe from dehydration. Check out the top-trending cuts currently dominating the style charts:
| Haircut Name | Best Suited For | Main Advantage |
| Long Bob (Lob) | Universally flattering for all style aesthetics | Instant visual thickness, effortless styling, fresh bounce |
| Classic Bob | Heart and round face shapes with sharp jawlines | Low maintenance, looks full without expensive products |
| Choppy Textures | Both naturally straight and wavy hair patterns | Gives finer strands incredible, weightless movement |
| Chic Pixie Cut | Daring trendsetters looking to highlight their eyes | Breathes major life into flat hair, maximizes density |


A classic cascading cut remains an absolute favorite for a reason. By mixing varying lengths seamlessly, even sparse strands instantly look beautifully full. Opting for a version without fringe shifts the primary focus right to your eyes, adding an incredibly soft, feminine elegance to your overall vibe.
Advice from MODISTA
- • Always make your first practice snip slightly lower than where you actually want your hair to sit, leaving a safe buffer zone to balance everything out later.
- • When working on a fringe, hold your scissors at a slight upward angle instead of horizontally—this point-cutting technique creates a beautifully soft edge.
- • Remember to thoroughly clean and sanitize your blade surfaces after every use to preserve that razor-sharp factory edge for as long as possible.
Have you ever taken the plunge and given yourself a quick trim or cut your own bangs at home, or does the idea seem way too risky? Save this handy guide to your bookmarks or share it in our Telegram channel with a bestie who’s ready to refresh her look!
MODISTA Daily MODISTA Daily MODISTA Daily
ℹ️ REFERENCE
The core insights and inspiration for this feature were sourced from the iconic beauty authority Cosmopolitan, an outlet renowned for its expert tips on personal style, self-care, and modern trends for women everywhere. Within its pages, industry leaders regularly break down simple beauty shortcuts that empower women worldwide to master their routines at home. You can explore the original work and more beauty content on their official site 🌐.