
You know what’s the best thing about baking? It’s that magical feeling when the whole family gathers in the kitchen, and the air is filled with the aroma of vanilla and something incredibly warm and homely. In my family, this atmosphere is created by these very kefir doughnuts. This is my lifesaver recipe when I crave something sweet, but am short on time.
I call them “five-minute” because the active preparation of the dough takes exactly that long! The recipe, as is often the case, came to me from my grandmother, but I slightly improved it by adding more kefir to make the dough as tender as possible. It is so simple that even a child can handle it. Try it, and I am sure that this recipe will become your “signature” one for unexpected guests or just for a soulful breakfast!
Ingredients for a Happy Breakfast (for 10-12 doughnuts)
| Ingredient | Quantity |
| Kefir (room temperature) | 250 ml |
| Chicken Egg (large) | 1 pc. |
| Granulated Sugar | 5 tbsp. |
| Sunflower Oil (for the dough) | 2 tbsp. |
| Wheat Flour (highest grade) | about 3 cups (may need a little more) |
| Baking Soda (do not quench, kefir will do it for us!) | 0.5 tsp. |
| Pinch of Salt | 1/3 tsp. |
| Icing Sugar (for dusting) | 2-3 tbsp. |
| Oil for Frying | 200–300 ml (about 1 cm in the pan) |
Step-by-Step Preparation: My Secrets to Perfect Doughnuts
Step 1: Combining Liquid Ingredients
First, I take a large bowl and whisk one egg in it with a fork. I add kefir (it must be at room temperature — this is important for the reaction with baking soda!), sugar, and a pinch of salt. I like the dough not to be too sweet, so I put 5 spoons. If you have a big sweet tooth, you can add one more. Mix well so that the sugar dissolves at least partially. Pour in two spoons of oil — it will make our doughnuts more tender.
Step 2: Time for Flour and “Magical” Soda
I add baking soda to the liquid mixture. Note: I do not quench it with vinegar, because the kefir has enough acid to start the process! I start gradually, in small portions, to introduce the flour, working with a spatula all the time. My advice: do not pour in all three cups at once. I always leave half a cup “in reserve”. The dough should turn out soft, elastic, slightly sticky to the hands, but already hold its shape well. If it is overworked with flour, the doughnuts will be “rubbery.”
Step 3: Shaping and Giving Character
I place the dough on a floured work surface. I divide it into two or three parts — it is more convenient for me to roll it out this way. I roll out each part to a thickness of about 1 centimeter. I take a regular glass or a culinary ring and press out circles. And for the doughnut to be a real one, I make a small hole in the middle — a small bottle cap or a pastry bag nozzle is suitable for this.
Підписуйтесь, щоб не пропустити нічого цікавого! | Follow us so you don't miss anything interesting! | Subskrybuj, aby nie przegapić niczego ciekawego!
Step 4: Frying in the Sunny “Lake”
I pour a lot of oil into a wide frying pan — about 1-1.5 cm high. I heat it up well! This is a very important point: if the oil is not hot enough, the doughnuts will absorb it like a sponge and will be greasy. I check for readiness by dropping a tiny piece of dough into the oil: if bubbles immediately appear around it, you can start. I fry the doughnuts over medium heat until a nice golden crust forms on both sides.
Step 5: The Final Touch
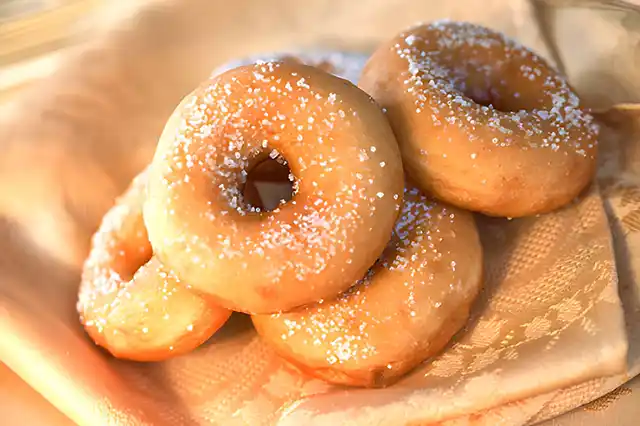
I always place the finished doughnuts on a paper towel. It will absorb the excess fat, and the pastry will be perfect. When they cool slightly, I generously sprinkle them with icing sugar. They are wonderful on their own, but if you have time, try drizzling them with lemon glaze — it will add incredible freshness!
Tips and Variations: A Little Culinary Creativity
Aroma: I always add a pinch of vanilla sugar or the zest of half a lemon to the dough. This instantly makes the taste deeper and more interesting.
Filling: Instead of holes, you can leave the doughnuts whole, and after frying, fill them with chocolate paste, custard, or thick berry jam using a pastry syringe.
For Adults: If you are preparing these doughnuts for an adult gathering, try adding 1 tablespoon of dark rum or cognac to the dough. The taste is richer, and the alcohol evaporates during frying.
Without Frying: If you avoid fried food, these doughnuts can be baked in the oven at 180°C (350°F) for about 10-15 minutes. They will be less golden but still very tasty and more diet-friendly.
So there it is, my secret to a quick and very delicious breakfast or dessert. I am convinced that these tender, airy kefir doughnuts will become a real hit in your family too, because it is not just baking, it is the genuine taste of home comfort. Cook with love, and enjoy your meal!
A Brief History of the Dish
The history of doughnuts, or donuts (as they are called in the US), spans more than one century. It is believed that the first prototypes appeared as early as Ancient Rome. In Ukrainian cuisine, their direct relative is the pampushka (savory fried bun). Various peoples prepared fried bread in fat so that it would last longer and be more satisfying.
Doughnuts gained the greatest popularity in the Netherlands, where they were known as olykoek (oily cake), and Dutch settlers later brought the recipe to America. The American donut with a hole in the center, which we know today, likely appeared thanks to Captain Hanson Gregory. Legend says he poked a hole in the center so that the dough would fry evenly and not remain raw inside. Our kefir doughnuts, however, are a simplified, quick, and very homemade variation of the classic pastry, perfectly suited for the modern pace of life.
| Characteristic | Value |
| Active Preparation Time | 15 minutes |
| Total Preparation Time | 25 minutes |
| Calorie Content (estimated, per 100 g) | 320-350 kcal |